
Talk to an Expert (504) 226-7070
Talk to an Expert (504) 226-7070

1. Key Takeaways
2. Your Pre-Repair Checklist
3. How to Repair Roof Flashing
4. Enjoy a More Secure, Worry-Free Home
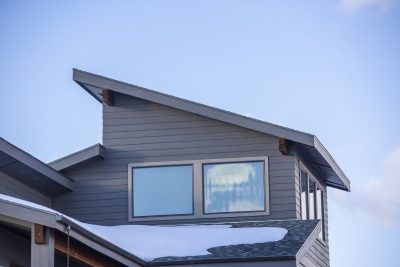
For roof flashing repair and preventing future leaks, rusty or poorly sealed flashing must be restored while providing proper installation. Roof flashing, typically metallic, protects weak areas like chimneys, vents, and valleys from water intrusion.
Repair includes sealing, replacing, or refilling cracked, damaged, or corroded components. TurnKey Roofer precautions include proper flashing overlap, roof-grade caulk sealing cracks, and regular inspections. Repair those issues and seal out future leaks. If you’re unsure where to begin, let us guide you through it. Get in touch with us today—we’re here to make your roof strong, secure, and worry-free.
Before you even begin work on roof flashing repairs, preparation is indispensable. That means, in short, a pre-repair checklist assists you in finding the trouble spots, working safely, and making no mistakes. Here’s what to cover:
Repairing a roof is dangerous. Start with a firm ladder on solid ground, supported. Use non-slip shoes, gloves, and a safety harness to prevent falling. Watch the weather reports—never work when it’s raining or extremely windy because wet surfaces heighten the accident possibilities. Always have a buddy puller or spotter around to give you a hand or summon help.
Gather all required tools in advance. A pry bar, hammer, and caulking gun — for prying up damaged flashing and affixing replacements. Roofing nails and tar-resistant roofing cement should be readily available. Utilize the utility knife for trimming and the tin snips for cutting metal flashing. Check tools for wear or damage to prevent delay or accidents mid-repair.
With the right materials, roof flashing is guaranteed to last. Select flashing appropriate to your roof—aluminum and galvanized steel are typical, with copper fitting upscale roofing. Apply weather-resistant sealants or heat and moisture-expansion and contraction-resistant roofing cement. In case of broken shingles around the flashing, be sure to replace them with quality shingles to maintain an even appearance and extended lifespan.
Correct flashing installation should adhere to local building codes. Here’s a quick reference:
| Requirement | Description |
| Overlap Specifications | Flashing must overlap by at least 10 cm. |
| Approved Sealants | Use region-specific approved materials. |
| Installation Guidelines | Follow the manufacturer’s instructions for best results. |
Consult these codes to be sure your repairs are up to code. Blunders will mean fines or deeper fixes down the road.
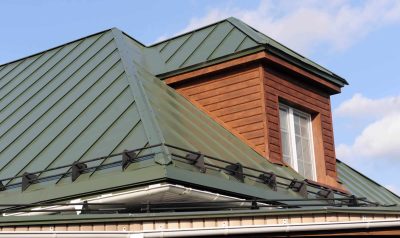
Roof flashing plays a vital role in protecting weak areas on your roof — such as chimneys, skylights, and valleys — from water entry. Faulty flashing can lead to structural failure and costly repairs. Let’s dive into a step-by-step analysis to repair roof flashing.
Tear away shingles and gravel covering the flashing so that you can get to the damaged area. Check both the flashing and nearby materials for concealed problems, like cracked shingles or wood rot. Pinpointing the underlying culprit—be it faulty installation, rust, or storm damage—is critical. Snap some good photos of the damage for reference before you begin repairs.
Take out the old flashing, taking care not to tear off adjacent shingles or blockage material. Rusted or damaged components need to be recycled.
Even off the surface for good adhesion of your new flashing. Remove old roofing cement or sealant, and inspect the roof deck for damage like rot or weakness. If desired, apply a primer to promote adhesion between the flashing and the roof.
Trim the new flashing to size, extending it at least 4 inches past the damaged area. Lay it down in place along the roofline, overlapping so it diverts water. Nail the flashing, then re-check alignment to ensure it’s water-tight.
Apply roofing cement or sealant along flashing edges, forcing it firmly to seal tightly. Replace shingles to restore the roof’s appearance and inspect for gaps. Half-yearly maintenance avoids most issues in the future.
Mending roof flashing takes patience and tenacity. Correctly repair seals and prevent more serious issues down the road. With regular inspections for damage and high-quality materials, you can keep your roof in optimal condition.
In need or have no idea where to start? TurnKey Roofer will repair and advise you on how to guard your roof against future leaks, as a solid roof equals a secure, stress-free house or building. Reach out to us today—we’d love to help keep your roof safe and reliable. Let’s get started on protecting your home together.


